How to install a Photoshop Action File (.atn)
Adobe Photoshop actions (.atn files) are a great way to automate repetitive tasks and apply a series of pre-defined edits or effects to your images. Here's a step-by-step guide on how to install and use .atn files in Adobe Photoshop:
Step 1: Download the .atn File
Begin by downloading the .atn file that contains the Photoshop action you want to install. You can find these files on various websites, often provided as free resources or as part of paid actions packs.

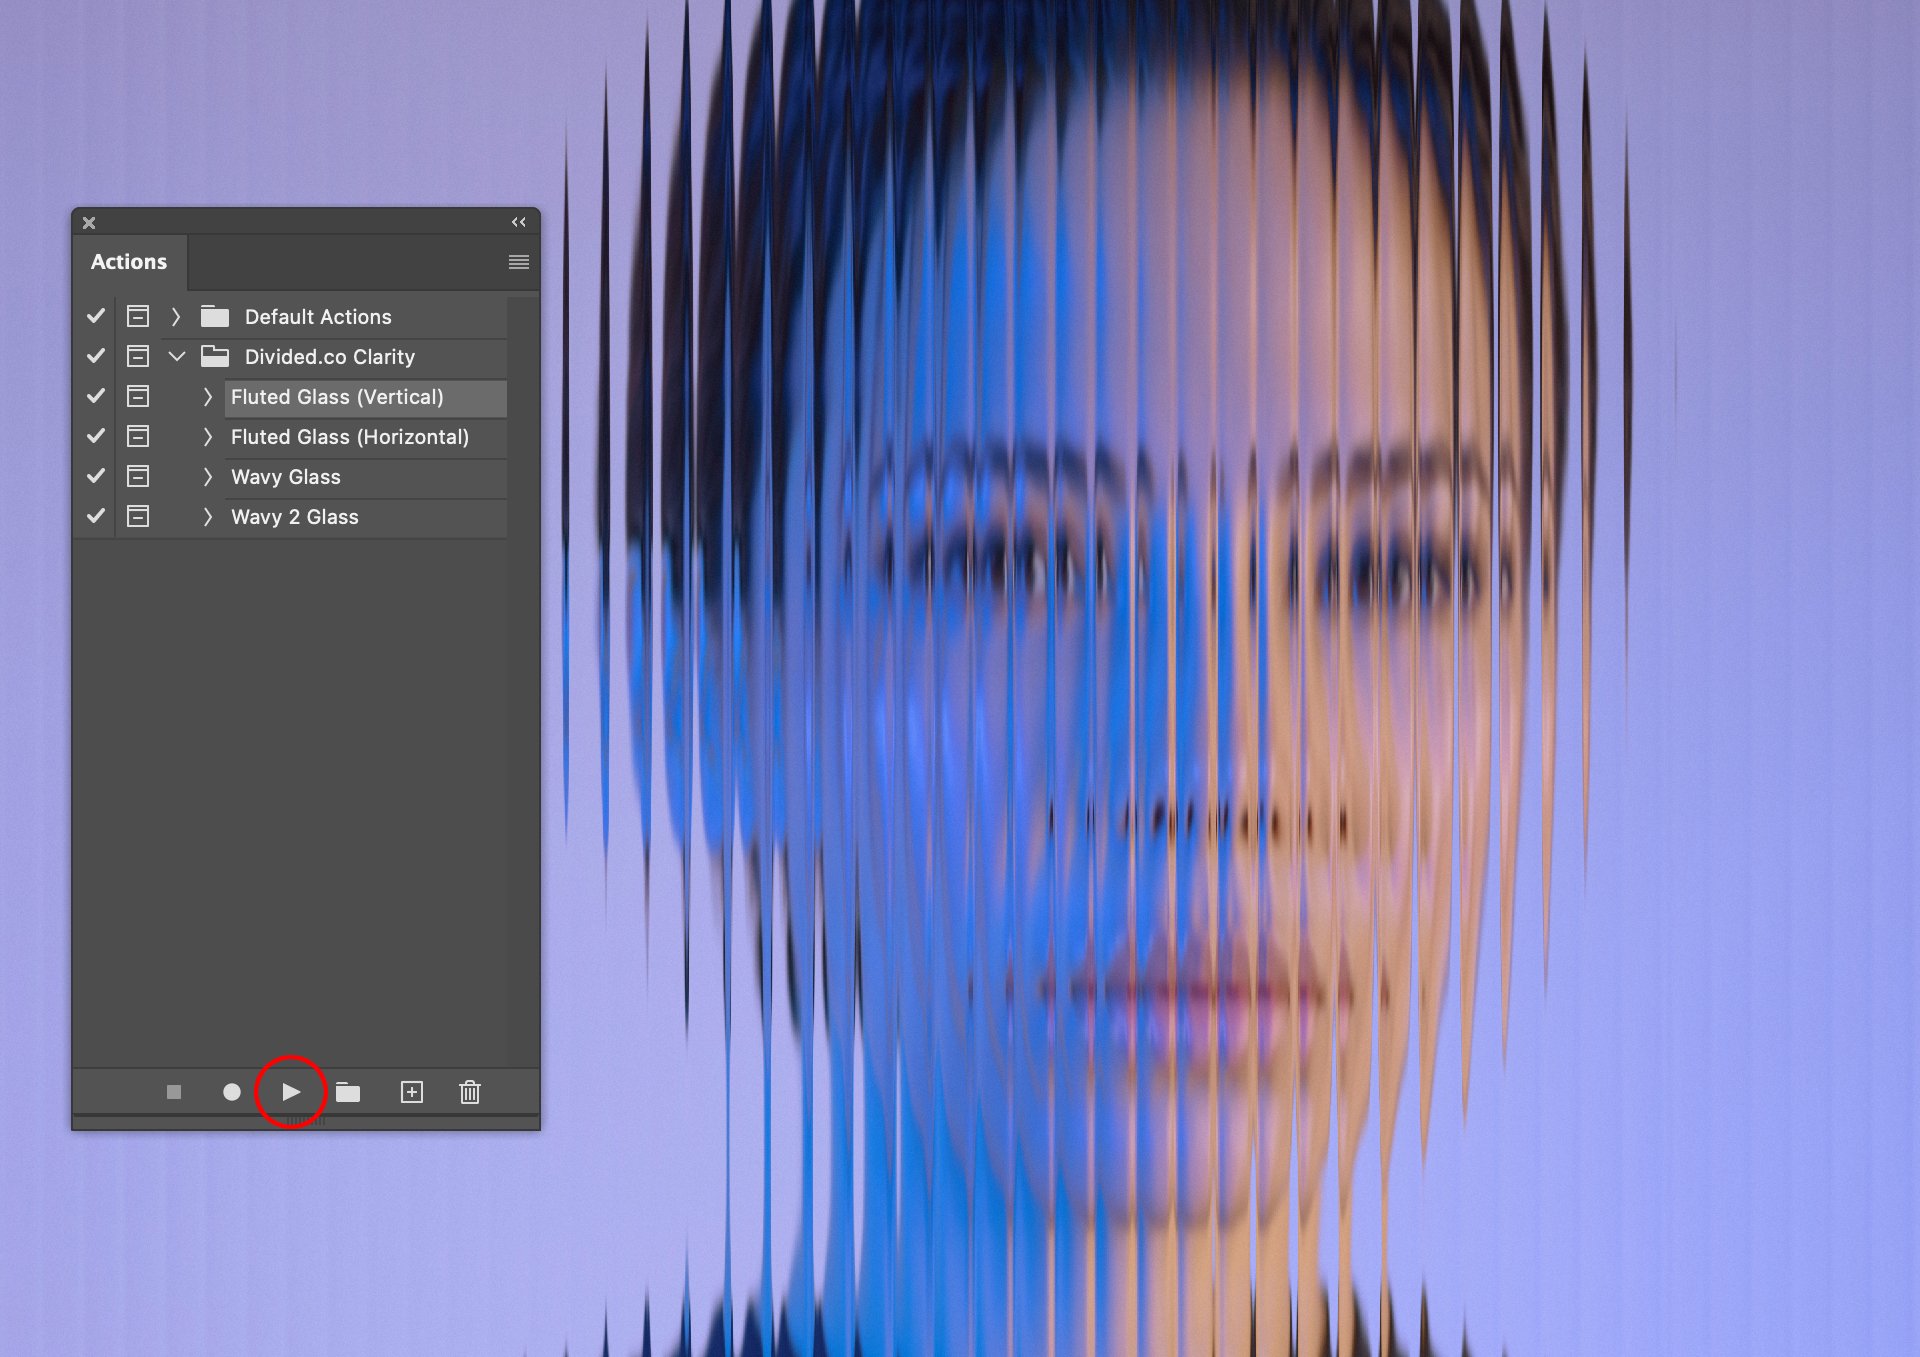
Clarity is a Photoshop Action which adds a glass overlay to your images. Choose from 4 of our predefined actions to add an element of texture and transparency to your photos.
Includes:
1 x Adobe Photoshop Action File (.atn)
2 x Fluted Glass Effects (Horizontal/Vertical)
2 x Wavy Glass Effects
How To Guide
Step 2: Locate the .atn File on Your Computer
After downloading, locate the .atn file on your computer. It's a good practice to keep all your Photoshop actions in a dedicated folder for easy access.
Step 3: Open Adobe Photoshop
Launch Adobe Photoshop on your computer. Make sure you have a version of Photoshop that supports actions (which includes most versions).
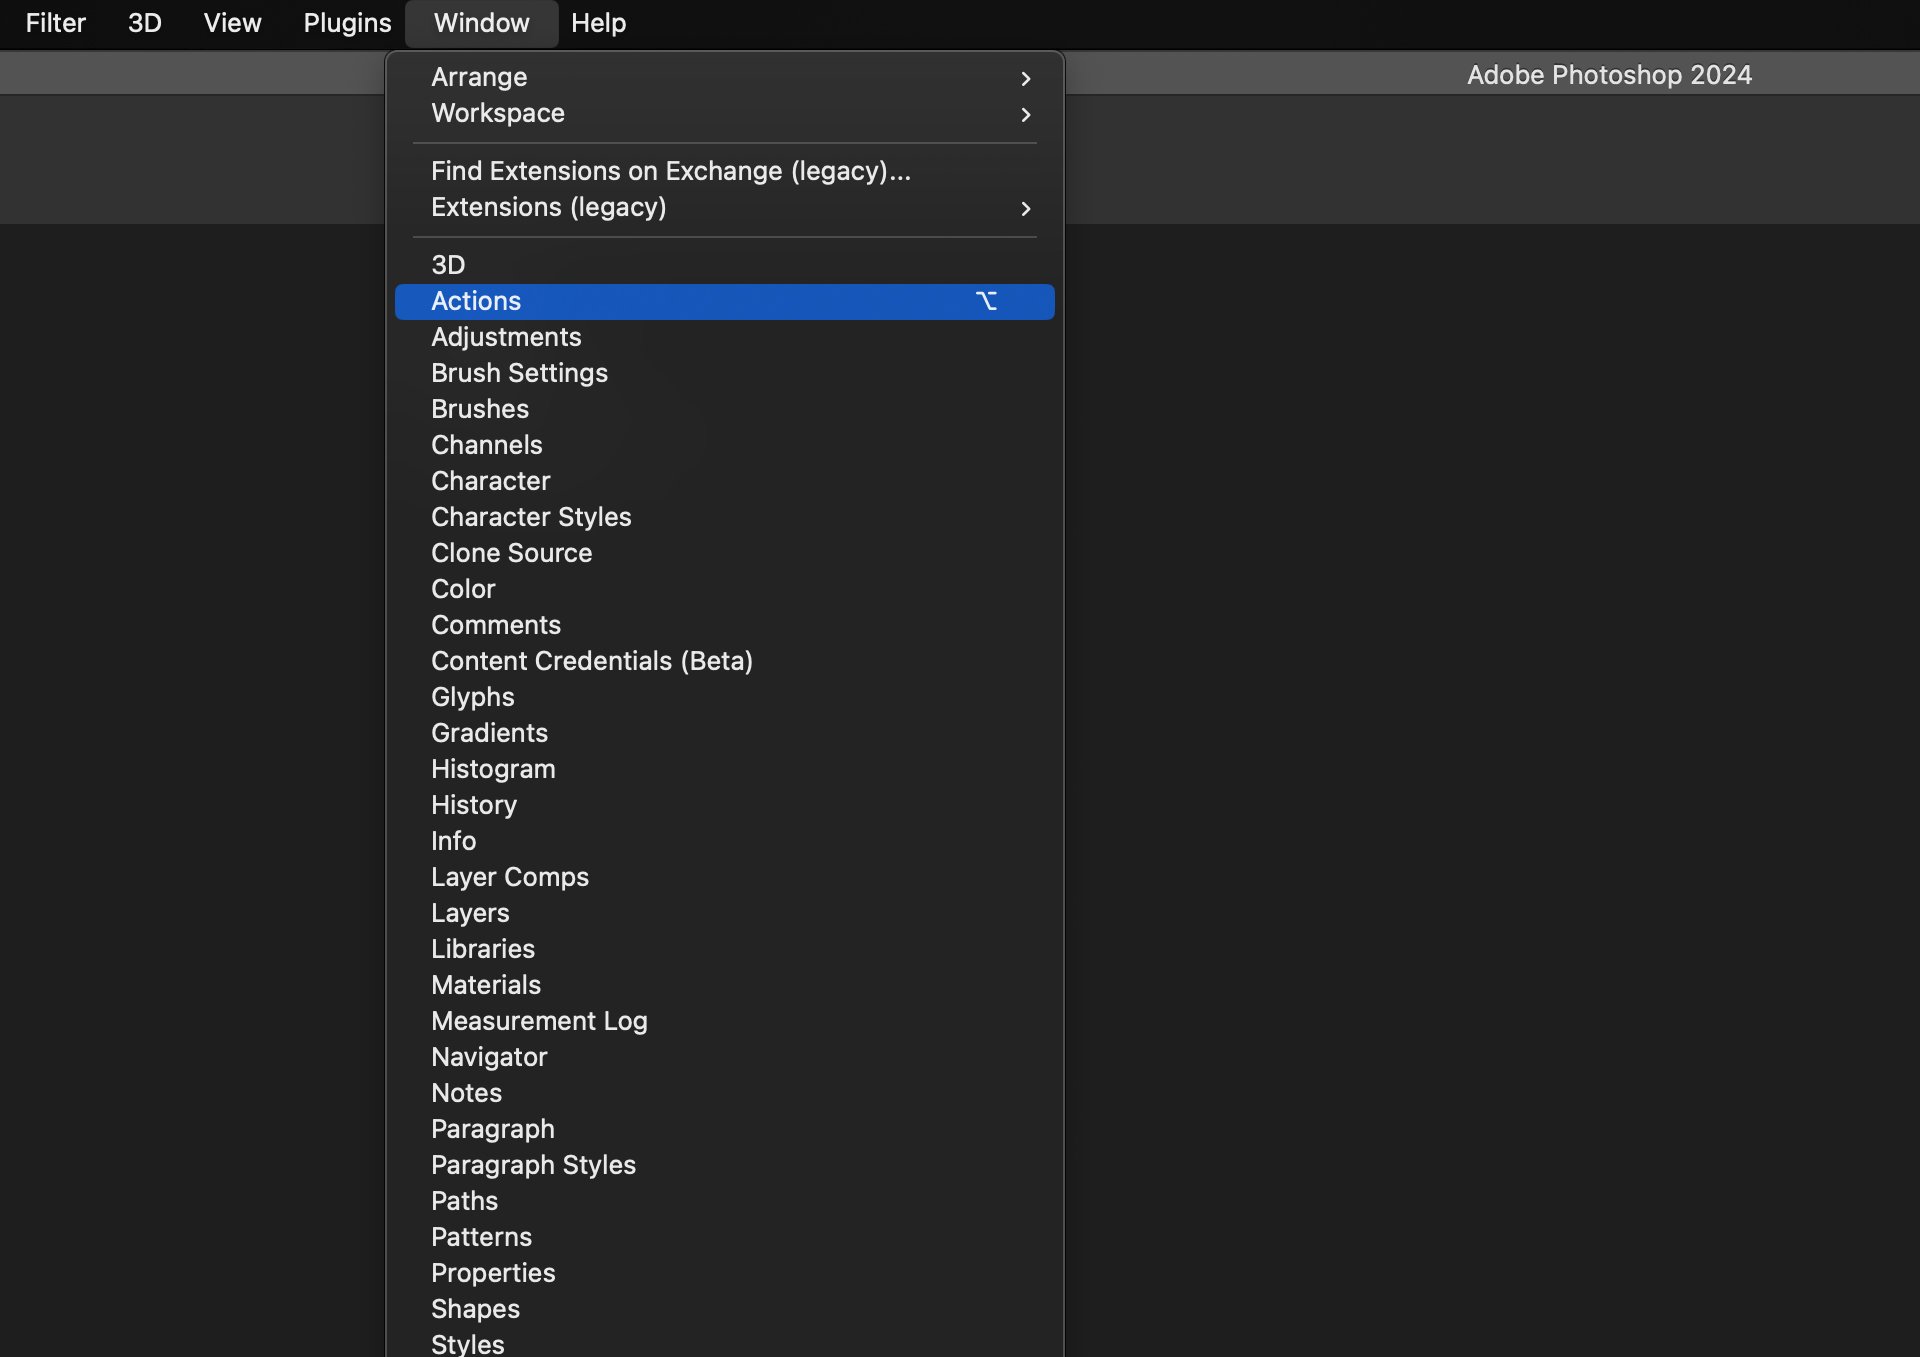
Step 4: Load the Actions Panel
To load the Actions panel, go to the "Window" menu at the top of the Photoshop interface. From the dropdown menu, select "Actions." This will open the Actions panel on the right side of your screen.
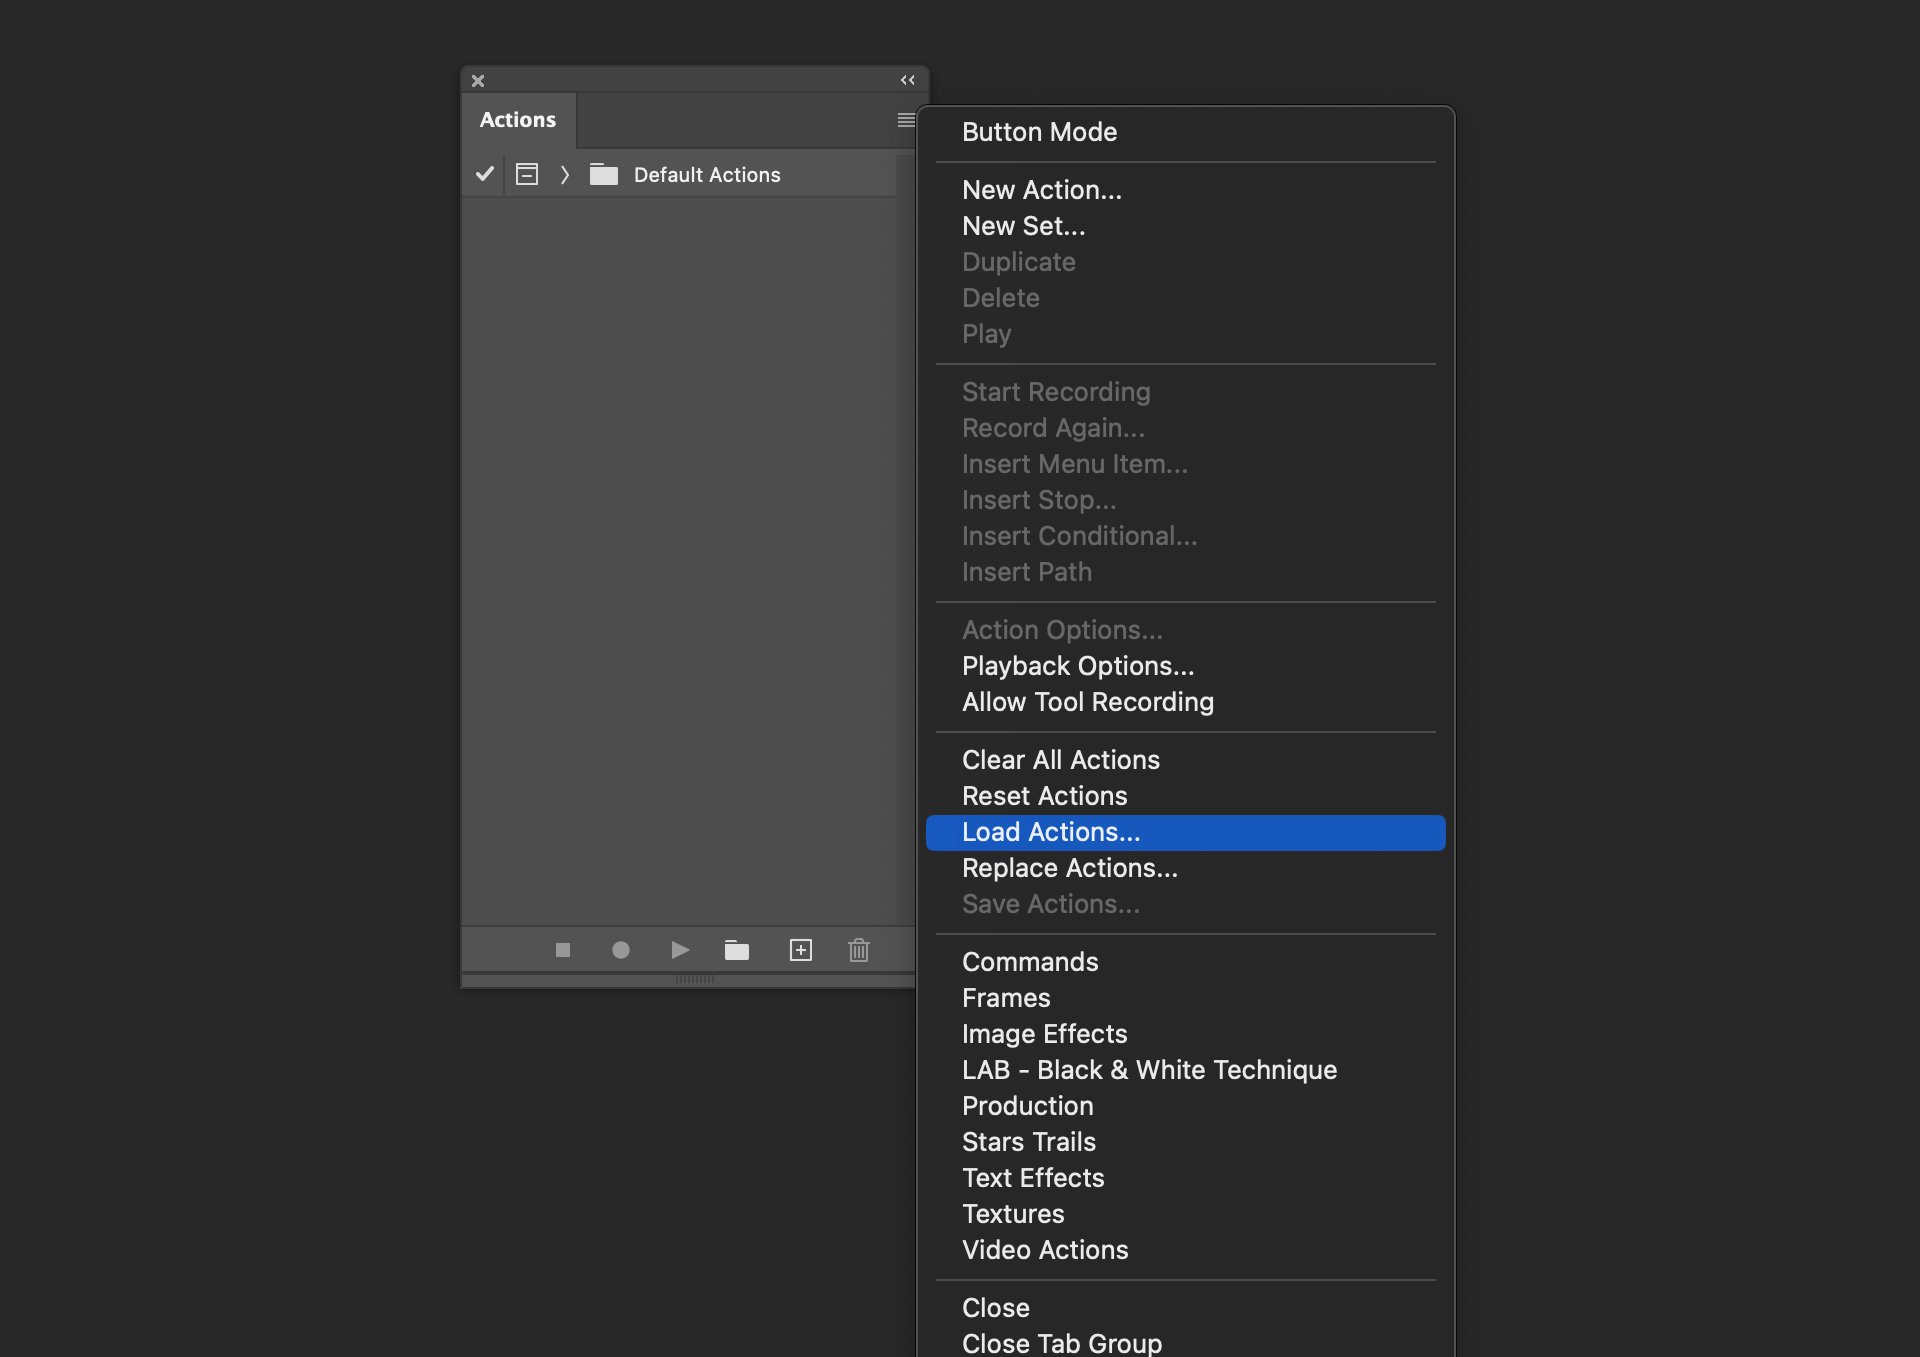
Step 5: Access the Actions Panel Options
In the Actions panel, you will see a small icon in the upper-right corner (represented as four horizontal lines). Click on this icon to access the Actions panel options menu.
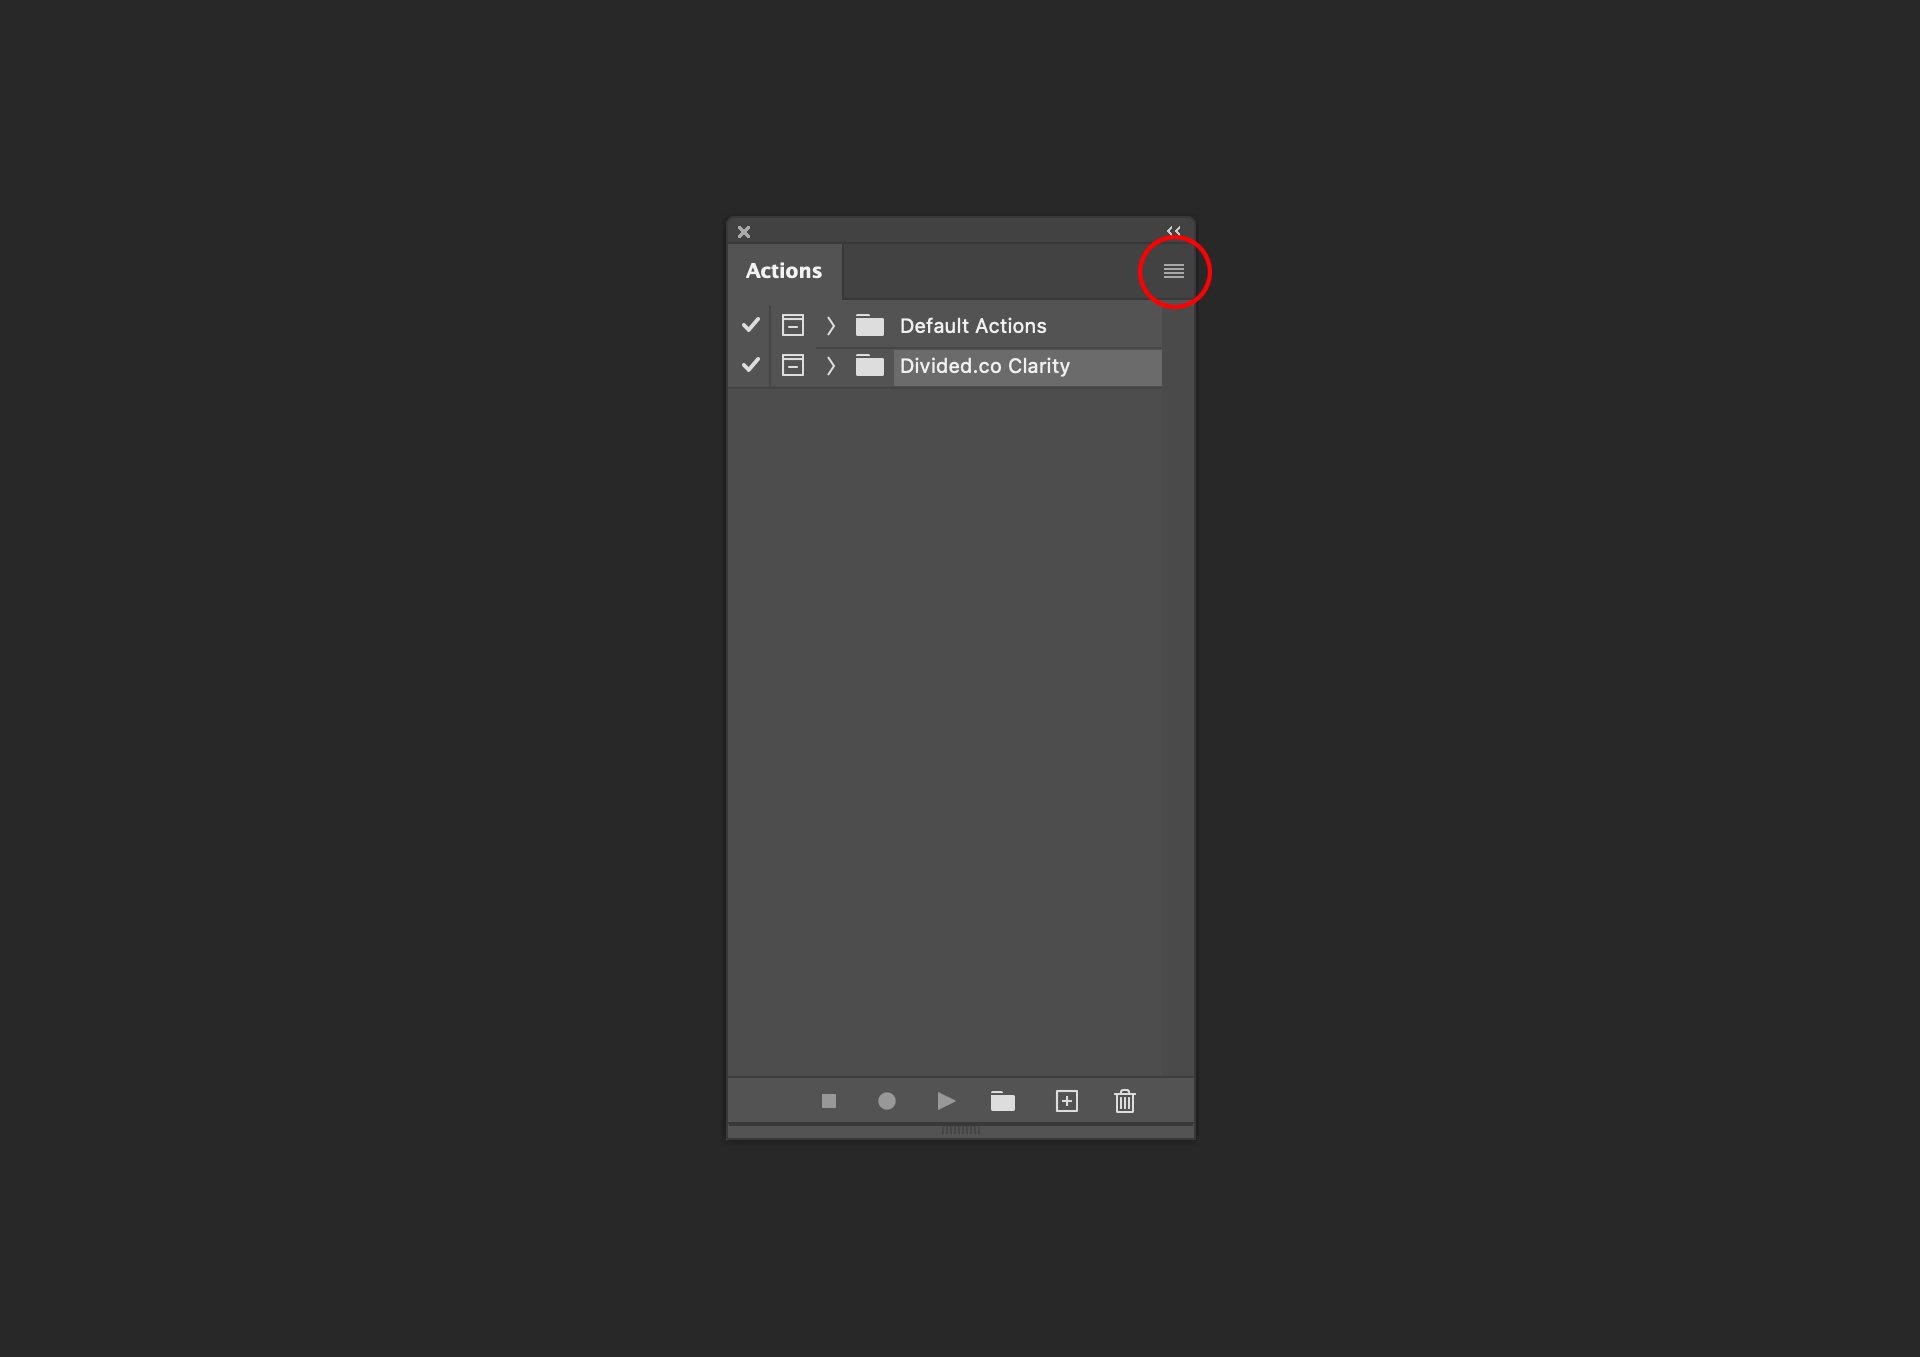
Step 6: Choose "Load Actions"
From the Actions panel options menu, select "Load Actions." This will open a file dialog box that allows you to browse for the .atn file you downloaded earlier.
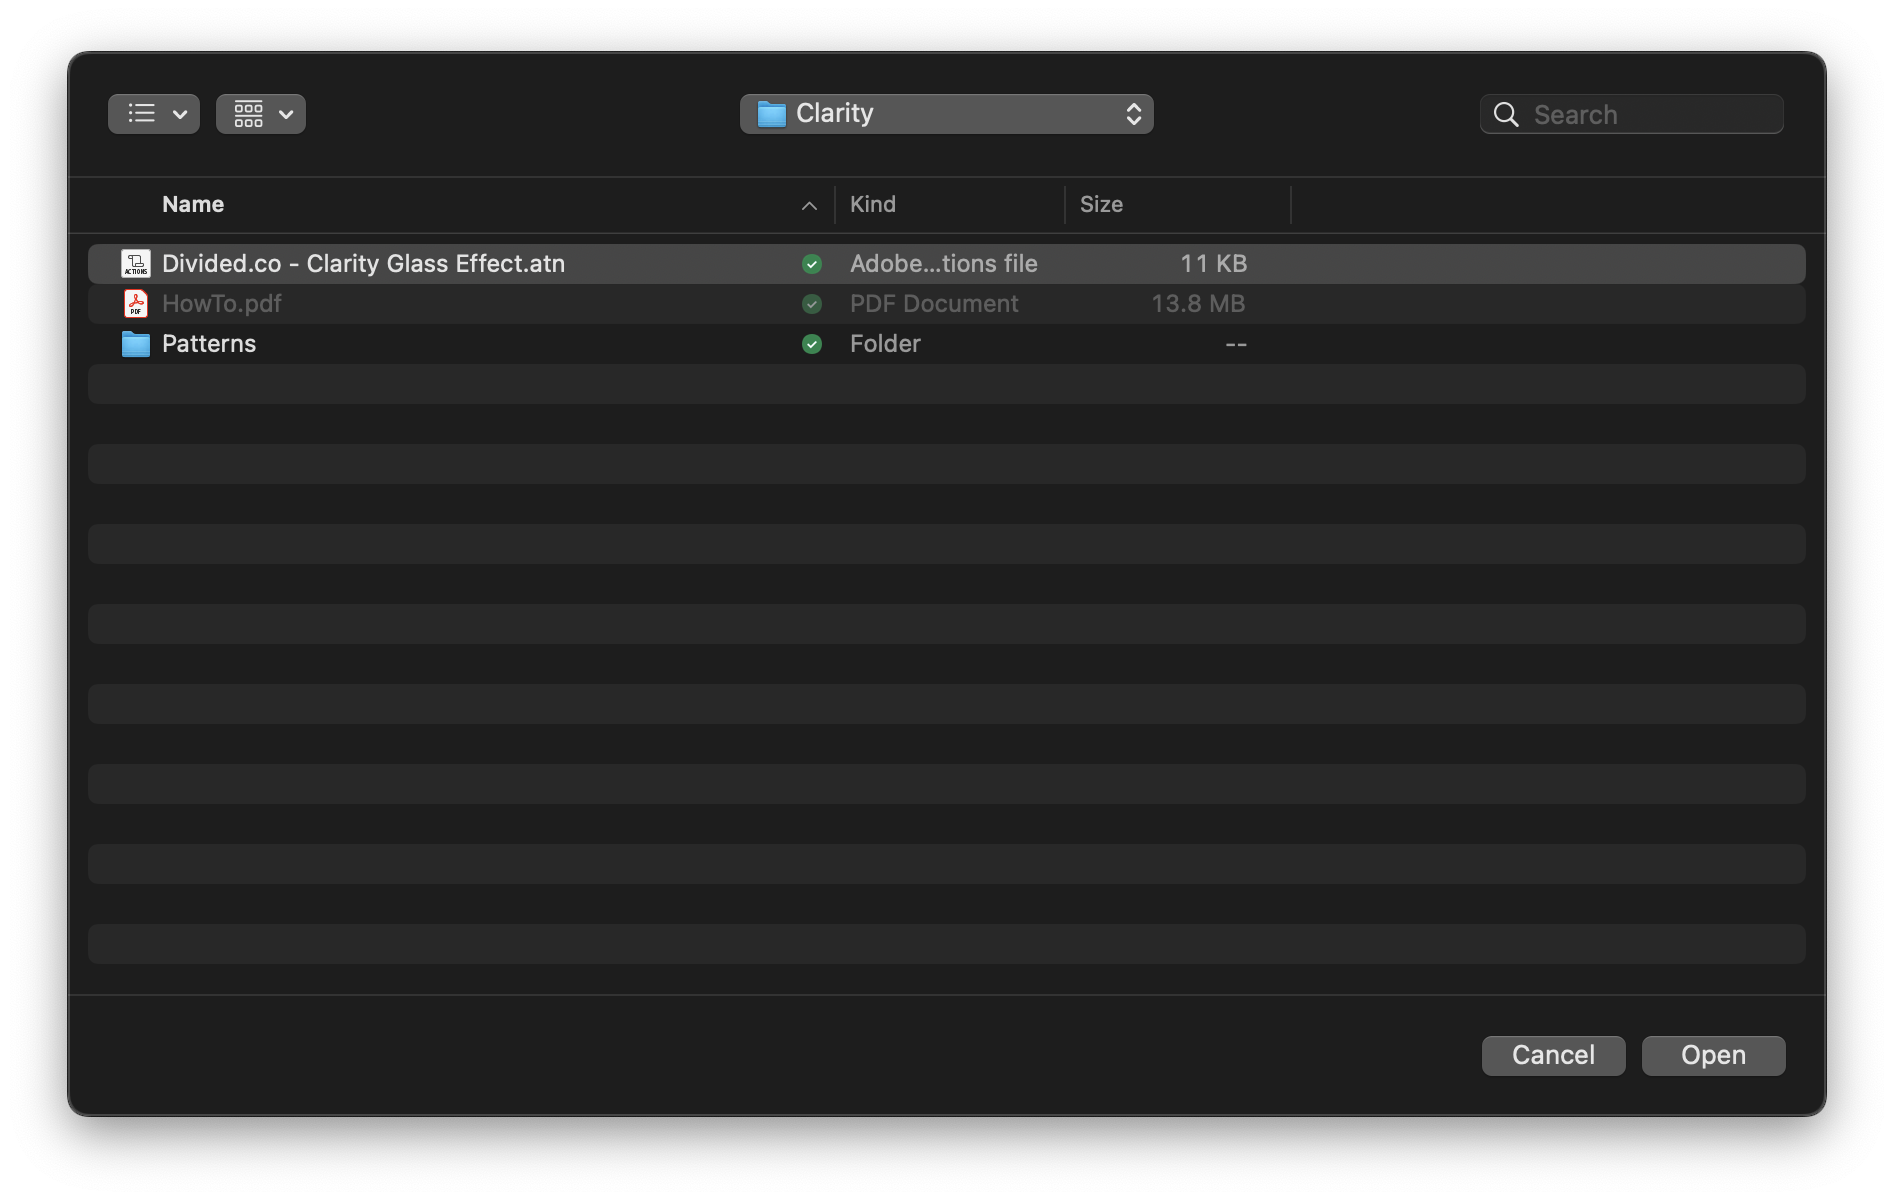
Step 7: Locate and Select the .atn File
In the file dialog box, navigate to the location where you saved the .atn file in Step 2. Select the .atn file and click "Load" (or "Open" depending on your operating system).
Step 8: Install the Action
Once you've selected the .atn file, Photoshop will load the action into the Actions panel. You will now see the newly installed action listed in the panel.

Step 9: Play the Action
To use the installed action, simply select the action in the Actions panel by clicking on its name. Once it's selected, click the "Play" button (a triangle icon) at the bottom of the panel. Photoshop will automatically execute the series of steps or edits defined in the action on your current image.
Trouble Shooting:
If you are prompted with a “The command ‘Filter Gallery’ is not currently available.” error message. This may be because of the following reasons:
Your document is in CMYK. Filter Gallery effects require RGB colour mode.
You can change your document to RGB via the menu bar. (Image > Mode > RGB) You can revert back to CMYK once you've applied the effect if necessary.
Your document isn't set to 8-bit. Filter Gallery effects currently only support 8-bit files. So if your document is set to 16-bit or 32-bit, you'll need to change to 8-bit.
You can change your document to 8-bit via the menu bar. (Image > Mode > 8 Bits/Channel)
Step 10: Customize and Adjust (Optional)
Most actions allow for some level of customization or adjustment. After playing the action, you can often tweak settings, opacity, or layer blending modes to achieve the desired effect on your image.
Step 11: Save Your Edited Image
Once you're satisfied with the results, save your edited image by going to "File" > "Save" or "File" > "Save As."
That's it! You've successfully installed and used an Adobe Photoshop action (.atn file). Actions are a powerful tool for streamlining your workflow and applying complex edits or effects with a single click, making them a valuable addition to your Photoshop toolkit.